



MyBatisCodeHelper-Pro破解[V3.4.4]


提前申明:这篇文章只用于作者个人记录,任何人不得转载、分享。不转发不扩散,如因此造成的任何损失或其他影响,本人概不承担。MyBatisCodeHelper-Pro 是一款很不错的 IDEA 插件,有能力的还是购买正版授权。如官方侵权或产生其他影响请联系我立即删除。
下载 MyBatisCodeHelper-Pro
在 idea 插件市场下载所需版本。目前分两个版本,一个是idea2023.2+版本使用,一个是idea2019.1 — 2023.1.7版本使用。更新时间:2025年07月04日
下载目前最新版:MyBatisCodeHelper-Pro。解压,找到 jar 包:instrumented-MyBatisCodeHelper-Pro241-3.4.4+2321
下载 cfr
一个 Java 反编译器,官网:https://www.benf.org/other/cfr
下载好后,将 cfr-0.152.jar 和 instrumented-MyBatisCodeHelper-Pro241-3.4.4+2321.jar 放在同一目录下,执行命令:
java -jar cfr-0.152.jar instrumented-MyBatisCodeHelper-Pro241-3.4.4+2321.jar --renamedupmembers true --hideutf false >> a.txt等待数秒钟命令执行完毕,分析 a.txt 文件:
最终定位到:搜索 @SerializedName(value="validTo")
public class f { // 付费密钥 @SerializedName(value="paidKey") private String var_java_lang_String_a; // 校验是否通过 @SerializedName(value="valid") private Boolean var_java_lang_Boolean_a; // 机器码 @SerializedName(value="userMac") private String b; // 激活截止日期 @SerializedName(value="validTo") private Long var_java_lang_Long_a;}我加了注释,然后我们使用 Java 字节码技术修改这个类的各个属性 get 方法,使之直接返回正确的值即可。
通过上述方法随便输入激活码激活时,正常都是成功的,但有的可能会发现激活是吧,报错:base64解密异常,分析报错信息
最终定位到:打开 a.txt,搜索 private static Gson
找到如下所在的包及类:
public class e { private static Gson a = new Gson();
public static f a(String string) { String string2; byte[] byArray = null; try { byArray = d.b(d.java_security_interfaces_RSAPublicKey_a(new String(Base64.getDecoder().decode("TUlHZk1BMEdDU3FHU0liM0RRRUJBUVVBQTRHTkFEQ0JpUUtCZ1FDZzUyUjExV0h1MysvNUV2WnhkS0l2a3ovekpnS2VNUUhNLytMVkxSZS9zWUpFQlUxbUUrODc3MmJJckk4UThscldqSHc5cmVjQ1RWVVhXUnhWYXBndk1HYTZ3KzU4STZwYXdSaFhwZDBrRkhUY2xxeUZGWFpoS3ZiQUtoblphRGNuZkJtSkhObTQwR0JFTGpCTmx5MXpha2FIblFmUzF0QlhaSGQwOUV0c2VRSURBUUFC"), Charsets.UTF_8)), Base64.getDecoder().decode(string)); } catch (b b2) { byArray = d.b(new c(), Base64.getDecoder().decode(string)); } f f2 = null; try { string2 = new String(byArray, "UTF-8"); } catch (UnsupportedEncodingException unsupportedEncodingException) { throw new RuntimeException(unsupportedEncodingException); } try { f2 = (f)a.fromJson(string2, f.class); } catch (Exception exception) { throw new RuntimeException("gson catch exception, the json string is" + string2, exception); } return f2; }}看他里面逻辑无非就是 base64 解析,然后 gson 转换。直接修改这个类即可。
使用 Javassist 修改类文件
添加 maven 依赖:
<dependency> <groupId>org.javassist</groupId> <artifactId>javassist</artifactId> <version>3.25.0-GA</version></dependency>如上分析,主要修改的就是 com.ccnode.codegenerator.af.f.e 的 e 方法。
CtClass ctClass = classPool.get("com.ccnode.codegenerator.af.f.e"); CtMethod parseLicenseMethod = ctClass.getDeclaredMethod("a", new CtClass[] { classPool.get("java.lang.String") }); StringBuffer bodyBuff = new StringBuffer(); bodyBuff.append("{") .append(" com.google.gson.Gson gson = new com.google.gson.Gson();") .append(" com.ccnode.codegenerator.af.d.f e = (com.ccnode.codegenerator.af.d.f)gson.fromJson($1,com.ccnode.codegenerator.af.d.f.class);") .append(" return e;") .append("}"); parseLicenseMethod.setBody(bodyBuff.toString());之前直接这么修改就完成了,但是后面作者加了验证,所以每一行我们都要去修改
try { ApplicationManager.getApplication().invokeLater(new Runnable(){
@Override public void run() { Messages.showErrorDialog((String)"你正在使用破解版的MybatisCodeHelperPro插件,将会生成错误的代码和造成电脑卡慢请到 https://brucege.com/pay/view 购买正版", (String)"MybatisCodeHelperPro插件非正版"); com.ccnode.codegenerator.j.a.com_ccnode_codegenerator_myconfigurable_Profile_a().setValid(false); ApplicationImpl applicationImpl = (ApplicationImpl)ApplicationManager.getApplication(); applicationImpl.exit(true, true); } }); } catch (Exception exception) { // empty catch block }我现在主要做的就是在进行验证的时候,我们直接return掉,代码如下:
// 修改第一个方法 CtClass ctClass = classPool.get("com.ccnode.codegenerator.af.f.e"); CtMethod parseLicenseMethod = ctClass.getDeclaredMethod("a", new CtClass[] { classPool.get("java.lang.String") }); StringBuffer bodyBuff = new StringBuffer(); bodyBuff.append("{") .append(" com.google.gson.Gson gson = new com.google.gson.Gson();") .append(" com.ccnode.codegenerator.af.d.f e = (com.ccnode.codegenerator.af.d.f)gson.fromJson($1,com.ccnode.codegenerator.af.d.f.class);") .append(" return e;") .append("}"); parseLicenseMethod.setBody(bodyBuff.toString());
//修改第二个方法 CtClass ctClass2 = classPool.get("com.ccnode.codegenerator.n.e"); CtMethod methodToModify2 = ctClass2.getDeclaredMethod("a"); methodToModify2.setBody("{ return; }");
//修改第三个方法 CtClass ctClass3 = classPool.get("com.ccnode.codegenerator.w.a"); CtMethod methodToModify3 = ctClass3.getDeclaredMethod("a"); methodToModify3.setBody("{ return; }");
//修改第四个方法 CtClass ctClass4 = classPool.get("com.ccnode.codegenerator.G.e.d"); CtMethod methodToModify4 = ctClass4.getDeclaredMethod("a", new CtClass[]{}); methodToModify4.setBody("{ return; }");
//修改第五个方法 CtClass ctClass5 = classPool.get("com.ccnode.codegenerator.ad.ab"); CtMethod methodToModify5 = ctClass5.getDeclaredMethod("a"); methodToModify5.setBody("{ return; }");
//修改第六个方法 CtClass ctClass6 = classPool.get("com.ccnode.codegenerator.ad.a.b"); CtMethod methodToModify6 = ctClass6.getDeclaredMethod("a"); methodToModify6.setBody("{ return; }");
//修改第七个方法 CtClass ctClass7 = classPool.get("com.ccnode.codegenerator.ae.a"); CtMethod methodToModify7 = ctClass7.getDeclaredMethod("a", new CtClass[] {}); methodToModify7.setBody("{ return; }");运行完成后,会将修改的 class 文件生成到指定目录下。
替换 jar 包的对应 class 文件
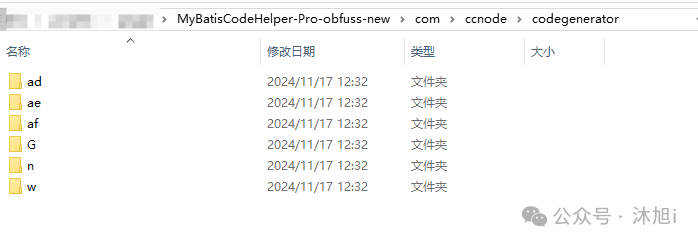
使用压缩工具 Bandzip 或 7zip 替换都有问题。推荐使用360压缩,这里值得注意的是要和 jar 里的的路径对应起来。
查看结果
然后将更新后的这个 jar 包,替换原始 jar 包,重启 idea,按如下格式输入离线激活码激活,大功告成。
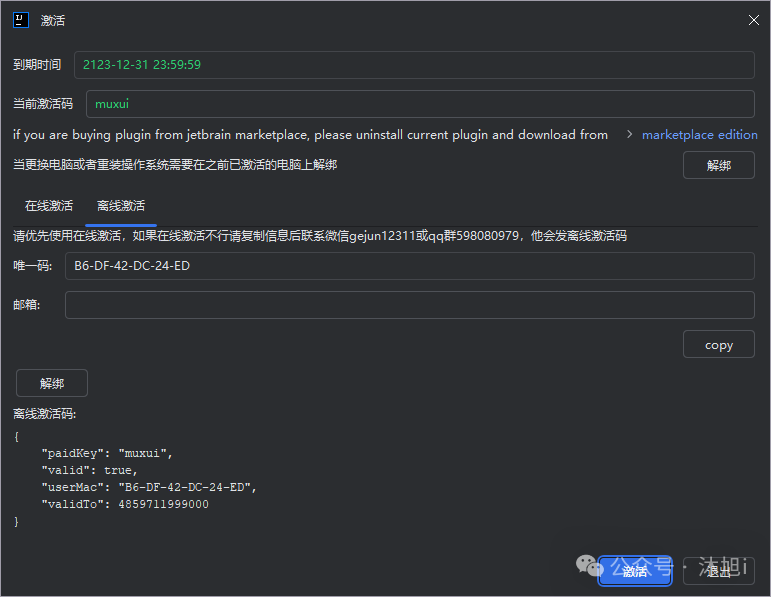
{ "paidKey": "muxui", "valid": true, "userMac": "离线激活时显示的唯一码", "validTo": 4859711999000}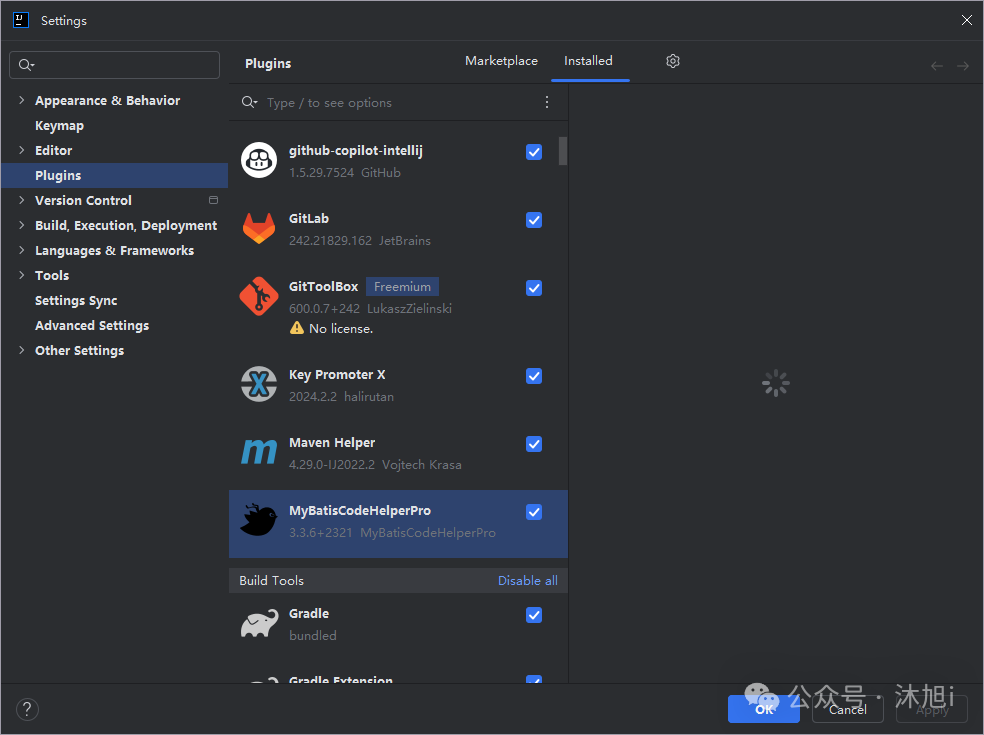
参考文章:
文章分享
如果这篇文章对你有帮助,欢迎分享给更多人!